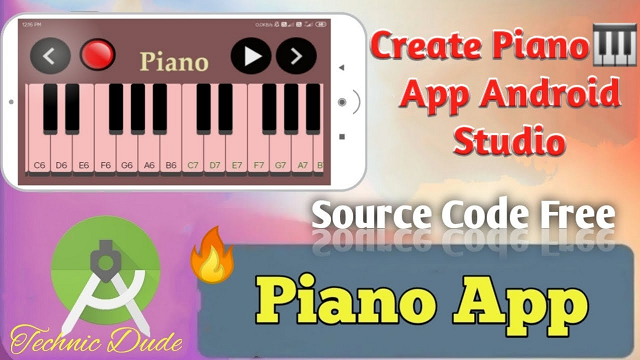
Creating a Virtual Piano Application for Android
Best Piano Apps for Android .Perfect piano app is an 99-key piano simulation mobile application that represents a real-life piano. It has a bunch of very clever features that makes it a wonderful tool to practice your piano and keyboard skills in make piano app in android studio.
Some of these features are single and double row mode, dual players mode (you can play with multiple people), chord mode (a mode that highlights the chords and tells you which ones work together), multi touch screen support (very important for a mobile application like this as it lets you touch the screen at multiple places at the same time) and an option to change the key widths.
Perfect pianos also has a learn to play mode, that will teach you step by step how to play thousands of popular songs with different speed and difficulty adjustments. What makes this mobile application, even more impressive is that it has midi keyboard USB support, which means you can connect a midi keyboard to your phone and play the midi controller through sounds on the application.

Creating a Virtual Piano App for Android
What makes this mobile application even greater is that you can record the piano and play it back. This simple application is really all you need in a piano simulation device. It will help you improve, practice and learn songs.
Now, we can create our dedicated PianoView. It will override the View from the Android standard SDK. We will render 14 white keys and 10 black keys for our Piano. We will use two lists to store the white and black keys of the Piano. Finally, we define a property for the AudioSoundPlayer object we will use to play the sounds associated to each key.
It will give us the following declaration for the class :
Make Piano App in Android studio
In the onSizeChanged callback of our PianoView object, we calculate the key’s width and we get the height for the keys. With these values, we can create the Key’s objects for the white and the black keys. For each key, we associate a RectF instance which will be used to represent them on the screen :
In the onDraw method of our PianoView, we have just to iterate on the key’s list to draw their RectF instance associated on the screen. For a white key, we use the white painter if the key is not down and the yellow painter otherwise. For a black key, we use the black painter if the key is not down and the yellow painter otherwise. And we don’t forget to draw the lines separating the white keys :
Like our Piano will support multi touches, we need to iterate on the point touched by the user. To know the number of points touched, we call the method of the current event. Then, we get the coordinates of each point and we try to get the key associated by calling method we will define later. If a key is well associated to the touched point, we set its down property to true.
After that, we iterate on all the keys of our Piano. If a key is down and its sound associated is not playing, we play the sound by calling the play Note method of the instance. Then, we redraw the Piano View by calling its invalidate method. Otherwise we release the current key by calling the release Key method.
Piano App in Android studio
If the key is not down, we call the stopNote method of the AudioSoundPlayer instance and we release the key :
Finally, we define the keyForCoords and releaseKey methods. In the first method, we iterate on the keys of the Piano to find if a key is associated to the tuple of coordinates passed in parameter. In the second method, we use a Handler object and we pass a Runnable implementation in its postDelayed method to release a specific Key in 100 ms. After that, we don’t forget to redraw the view to see the updates on the screen :
YouTube Video
Just below, you can discover the complete source code for the Piano View :
Playing the music of our Piano
To play the music of our Piano, we need to create the Audiovisuals object seen previously in this tutorial. Each sound will be played in a dedicated thread. So, we need a property to store the Play Thread objects. Besides, we will use a Sparse Array to associate each index of the keys with a sound name. Finally, we define two constants for the volumes of the sounds we will play :
The sounds’ files will be stored in the assets folder of our Android project.
Creating Piano app in android studio
Defining the User Interface of our Piano Application
The components of our Piano Application written, we can define the User Interface of our Piano. It will be quite simple : just a PianoView matching the parent layout :
Writing the Java code of the Piano Activity
Finally, we can just have a look to the Java code of the PianoActivity. Nothing to write, all is already good :
Our Virtual Piano in Action
Now, it is the best part of our tutorial since we are going to put our Virtual Piano in action. If you followed the tutorial correctly, you should have the following result on your smartphone or tablet :
Download Source Code
Click below to get the full source code android Piano application.
Piano App APK Download : Click Me
Conclusion
We have successfully created a Piano App Android application using Android Studio.
Cheers!

Don’t Forget to Share this Post.
Don’t hesitate to give me your feedback for this tutorial in comments.
You can also visit Technic Dude Channel on YouTube to discover more tutorials on Android Development :

